Installing OpenVPN
# yum install epel-release
# yum install openvpn
Building CA with EasyRSA
# cd /usr/local/src
# wget https://github.com/OpenVPN/easy-rsa/releases/download/v3.0.5/EasyRSA-nix-3.0.5.tgz
# tar xzf EasyRSA-nix-3.0.5.tgz -C /usr/local
# cd /usr/local/EasyRSA-3.0.5/
# cp vars.example vars
uncomment and update the following entries to match your information:
# vi vars
set_var EASYRSA_REQ_COUNTRY “CN”
set_var EASYRSA_REQ_PROVINCE “Jiangsu”
set_var EASYRSA_REQ_CITY “Suzhou”
set_var EASYRSA_REQ_ORG “Betterit”
set_var EASYRSA_REQ_EMAIL “admin@betterit.info”
set_var EASYRSA_REQ_OU “IT”
Save and close the file.
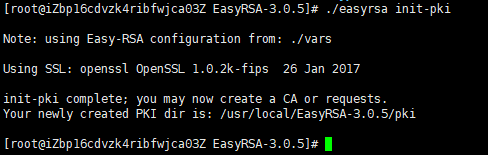
Before generating a CA keypair first we need to initialize a new PKI with:
# ./easyrsa init-pki
The next step is to build the CA:
# ./easyrsa build-ca
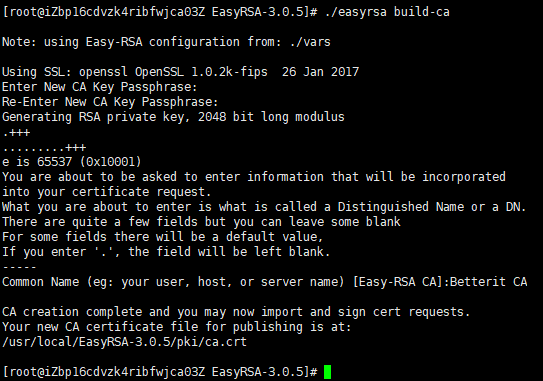
You’ll be asked to set a password for the CA key and enter a common name for your CA.
Once completed, the script will create two files — CA public certificate ca.crt and CA private key ca.key.
Now that the Certificate Authority (CA) is created, you can use it to sign certificate requests for one or multiple OpenVPN servers and clients.
Note:If you don’t want to be prompted for a password each time you sign your certificates, run the build-ca command using the nopass option: ./easyrsa build-ca nopass.
Creating Diffie-Hellman and HMAC keys
[root@iZbp16cdvzk4ribfwjca03Z EasyRSA-3.0.5]# ./easyrsa gen-dh
Note: using Easy-RSA configuration from: ./vars
Using SSL: openssl OpenSSL 1.0.2k-fips 26 Jan 2017
Generating DH parameters, 2048 bit long safe prime, generator 2
This is going to take a long time
……………………………………………………..+………………………..
……………………….+………………….+…………………………………………………………………………………….++*++*
DH parameters of size 2048 created at /usr/local/EasyRSA-3.0.5/pki/dh.pem
[root@iZbp16cdvzk4ribfwjca03Z EasyRSA-3.0.5]#
Copy the dh.pem file to the /etc/openvpn directory:
# cp pki/dh.pem /etc/openvpn/
generate a HMAC signature using the openvpn binary:
# openvpn –genkey –secret ta.key
Once completed copy the ta.key file to the /etc/openvpn directory:
# cp ta.key /etc/openvpn/
Creating Server Certificate and Private Key
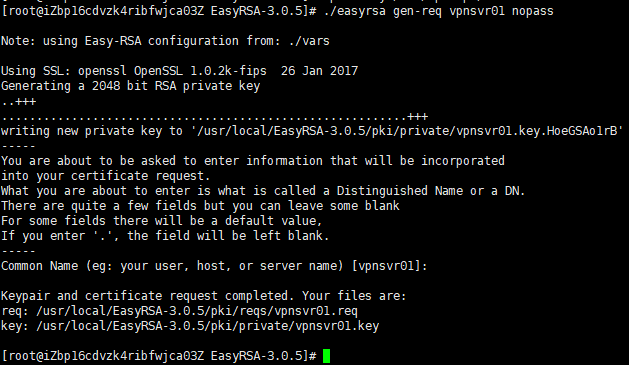
./easyrsa gen-req vpnsvr01 nopass
We are using the nopass argument because we want to start the OpenVPN server without a password input. Also in this example, we are using vpnsvr01 as a server name (entity) identifier. If you choose a different name for your server don’t forget to adjust the instructions below where the server name is used.
The command will create two files, a private key (vpnsvr01.key) and a certificate request file (vpnsvr01.req).
Copy the private key to the /etc/openvpn directory:
# cp pki/private/vpnsvr01.key /etc/openvpn/
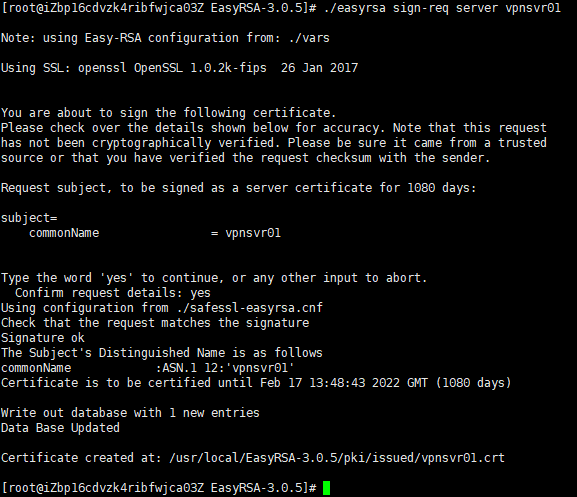
run the following command to sign the request:
./easyrsa sign-req server vpnsvr01
The first argument can either be server or client and the second one is the server short (entity) name.
# cp pki/ca.crt /etc/openvpn/
# cp pki/issued/vpnsvr01.crt /etc/openvpn/
Upon completing the steps outlined in this section, you should have the following new files on your OpenVPN server:
/etc/openvpn/ca.crt
/etc/openvpn/dh.pem
/etc/openvpn/ta.key
/etc/openvpn/vpnsvr01.crt
/etc/openvpn/vpnsvr01.key
Configuring the OpenVPN Service
We will use the sample configuration file provided with OpenVPN installation package as a starting point and then add our own custom configuration options to it.
# cp /usr/share/doc/openvpn-*/sample/sample-config-files/server.conf /etc/openvpn/vpnsvr01.conf
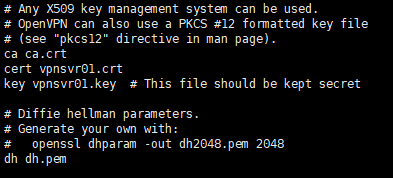
Open the file and Find the Certificate, Key and DH parameters directives and change the file names:
# vi /etc/openvpn/vpnsvr01.conf
cert vpnsvr01.crt
key vpnsvr01.key
dh dh.pem
To redirect the clients traffic through the VPN find and uncomment the redirect-gateway and dhcp-option options:
push “redirect-gateway def1 bypass-dhcp”
push “dhcp-option DNS 208.67.222.222”
push “dhcp-option DNS 208.67.220.220”
By default OpenDNS resolvers are used. You can change it and use Google or any other DNS resolvers you want.
Find the user and group directives and uncomment these settings by removing the “;” at the beginning of each line:
user nobody
group nogroup
Append the following line at the end of the file. This directive will change the message authentication algorithm (HMAC) from SHA1 to SHA256
auth SHA256
Once you are done, the server configuration file (excluding comments) should look something like this:
port 1194
proto udp
dev tun
ca ca.crt
cert vpnsvr01.crt
key vpnsvr01.key # This file should be kept secret
dh dh.pem
server 10.8.0.0 255.255.255.0
ifconfig-pool-persist ipp.txt
push “dhcp-option DNS 208.67.222.222”
push “dhcp-option DNS 208.67.220.220”
keepalive 10 120
tls-auth ta.key 0 # This file is secret
cipher AES-256-CBC
user nobody
group nobody
persist-key
persist-tun
status openvpn-status.log
verb 3
explicit-exit-notify 1
auth SHA256
Starting OpenVPN Service
# systemctl start openvpn@vpnsvr01
Verify whether the service has started successfully by typing:
# systemctl status openvpn@vpnsvr01
Enable the service to automatically start on boot with:
# systemctl enable openvpn@vpnsvr01
When starting, the OpenVPN Server creates a tun device tun0. To check if the device is available, type:
# ip a show tun0

Firewall and Server Networking Configuration
In order to forward network packets properly, we need to enable IP forwarding.
Open the /etc/sysctl.conf file and add the following line:
net.ipv4.ip_forward = 1
Apply the new settings by running the following command:
sysctl -p
Now we need to add firewall rules open OpenVPN port and to enable masquerading.
Start by adding the tun0 interface to the trusted zone:
firewall-cmd –permanent –zone=trusted –add-interface=tun0
Open the default openvpn port 1194 by adding the openvpn service to the list of services allowed by firewalld :
firewall-cmd –permanent –add-service openvpn
Set IP masquerading on trusted zone:
firewall-cmd –permanent –zone=trusted –add-masquerade
Before adding the nat rule you need to know the public network interface of your CentOS OpenVPN Server. You can easily find the interface by running the following command:
ip -o -4 route show to default | awk ‘{print $5}’
In our case, the interface is named eth0 as shown on the output below. Your interface may have a different name.
The following command will allow the traffic to leave the VPN, giving your VPN clients access to the Internet. Don’t forget to replace eth0 to match the name of public network interface you found in the previous command.
firewall-cmd –permanent –direct –passthrough ipv4 -t nat -A POSTROUTING -s 10.8.0.0/24 -o eth0 -j MASQUERADE
Finally reload the firewall rules for changes to take effect:
firewall-cmd –reload
Creating the Client Configuration Infrastructure
The whole process of generating the client certificate and configuration file is as follows:
- Generate a private key and certificate request on the OpenVPN server.
- Send the request to the CA machine to be signed.
- Copy the signed SSL certificate to the OpenVPN server and generate a configuration file.
- Send the configuration file to the VPN client’s machine.
Start by creating a set of directories to store the clients files:
# cd /etc/openvpn
# mkdir -p openvpn-clients/{configs,base,files}
- base directory will store the base files and configuration that will be shared across all client files.
- configs directory will store the generated client configuration.
- files directory will store client-specific certificate/key pair.
Copy the ca.crt and ta.key files to the openvpn-clients/base directory:
# cp ta.key openvpn-clients/base
# cp ca.crt openvpn-clients/base
Next copy the sample VPN client configuration file into the client-~/openvpn-clients/base directory. We will use this file as a base configuration:
# cp /usr/share/doc/openvpn-*/sample/sample-config-files/client.conf openvpn-clients/base
Now we need to edit the file to match our server settings and configuration.
# vi openvpn-clients/base/client.conf
Find the remote directive and change the default placeholder with the public IP address of your OpenVPN server:
# The hostname/IP and port of the server.
# You can have multiple remote entries
# to load balance between the servers.
remote YOUR_SERVER_IP 1194
Locate and comment the ca, cert, and key directives. The certs and keys will be added within the configuration file:
# SSL/TLS parms.
# See the server config file for more
# description. It’s best to use
# a separate .crt/.key file pair
# for each client. A single ca
# file can be used for all clients.
# ca ca.crt
# cert client.crt
# key client.key
Append the following lines at the end of the file to match the server settings:
auth SHA256
key-direction 1
Once you are done, the server configuration file should look something like this:
client
dev tun
proto udp
remote 118.31.38.47 1194
resolv-retry infinite
nobind
persist-key
persist-tun
remote-cert-tls server
tls-auth ta.key 1
cipher AES-256-CBC
verb 3
auth SHA256
key-direction 1
Next, create a simple bash script that will merge the base configuration and files with the client certificate and key, and store the generated configuration in the openvpn-clients/configs directory.
vi openvpn-clients/gen_config.sh
#!/bin/bash
FILES_DIR=/etc/openvpn/openvpn-clients/files
BASE_DIR=/etc/openvpn/openvpn-clients/base
CONFIGS_DIR=/etc/openvpn/openvpn-clients/configs
BASE_CONF=${BASE_DIR}/client.conf
CA_FILE=${BASE_DIR}/ca.crt
TA_FILE=${BASE_DIR}/ta.key
CLIENT_CERT=${FILES_DIR}/${1}.crt
CLIENT_KEY=${FILES_DIR}/${1}.key
# Test for files
for i in “$BASE_CONF” “$CA_FILE” “$TA_FILE” “$CLIENT_CERT” “$CLIENT_KEY”; do
if [[ ! -f $i ]]; then
echo ” The file $i does not exist”
exit 1
fi
if [[ ! -r $i ]]; then
echo ” The file $i is not readable.”
exit 1
fi
done
# Generate client config
cat > ${CONFIGS_DIR}/${1}.ovpn <<EOF
$(cat ${BASE_CONF})
<key>
$(cat ${CLIENT_KEY})
</key>
<cert>
$(cat ${CLIENT_CERT})
</cert>
<ca>
$(cat ${CA_FILE})
</ca>
<tls-auth>
$(cat ${TA_FILE})
</tls-auth>
EOF
Save the file and make it executable by running:
chmod u+x openvpn-clients/gen_config.sh
Creating Client Certificate Private Key and Configuration
In this example the name of the first VPN client will be david.
# cd /usr/local/EasyRSA-3.0.5/
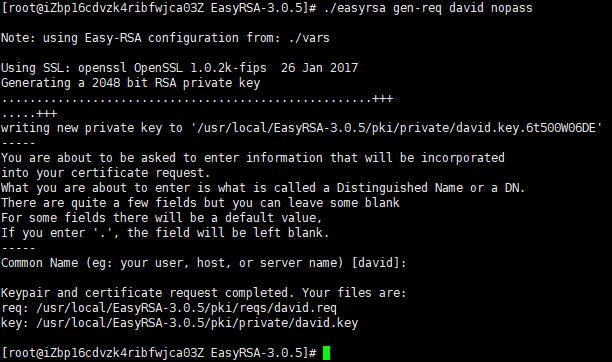
# ./easyrsa gen-req david nopass
The command will create two files, a private key (david.key) and a certificate request file (david.req).
Copy the private key david.key to the /etc/openvpn/openvpn-clients/files directory you created in the previous section:
# cp pki/private/david.key /etc/openvpn/openvpn-clients/files/
run the following command to sign the request:
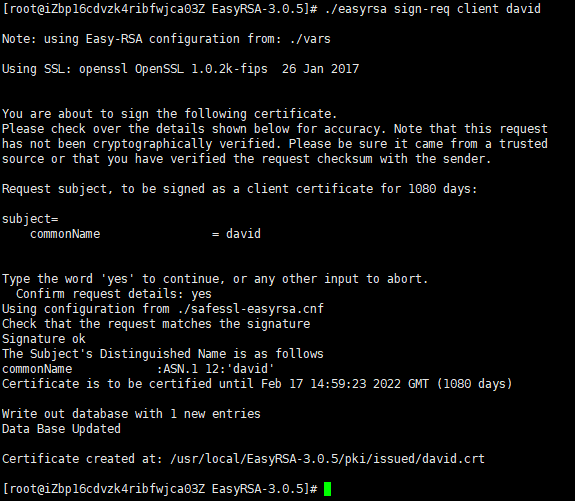
# ./easyrsa sign-req client david
Copy the david.crt file to the /etc/openvpn/openvpn-clients/files directory
# cp pki/issued/david.crt /etc/openvpn/openvpn-clients/files/
The final step is to generate a client configuration using the gen_config.sh script:
# cd /etc/openvpn/openvpn-clients/
# ./gen_config.sh david
The script will create a file named david.ovpn in the configs directory.

At this point the client configuration is created. You can now transfer the configuration file to the device you intend to use as a client.
Revoking Client Certificates
Revoking a certificate means to invalidate a signed certificate so that it can no longer be used for accessing the OpenVPN server.
Run the easyrsa script using the revoke argument, followed by the client name you want to revoke:
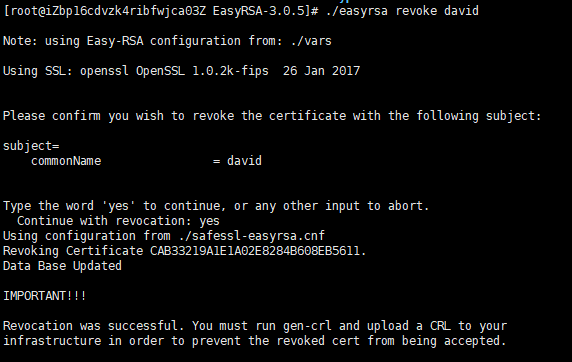
# ./easyrsa revoke david
Use the gen-crl option to generate a certificate revocation list (CRL):
# ./easyrsa gen-crl
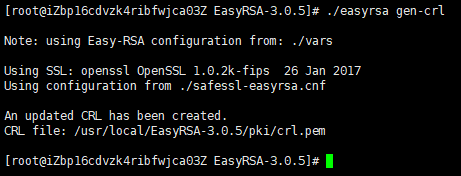
Copy the file crl.pem to the /etc/openvpn directory:
# cp pki/crl.pem /etc/openvpn/
Open the OpenVPN server configuration file,Paste the following line at the end of the file:
# vi /etc/openvpn/vpnsvr01.conf
crl-verify crl.pem
Restart the OpenVPN service for the revocation directive to take effect:
# systemctl restart openvpn@vpnsvr01
注意事项:
1.openvpn服务器防火墙必须开启,并配置相关规则。不开启防火墙,openvpn客户端连接后无法连通openvpn服务器所在网段及其它网段IP。
2.openvpn客户端要连通openvpn服务器所在网段及其它网段IP,还需在openvpn服务器配置文件中添加类似如下配置项:
push “route 192.168.50.0 255.255.255.0” //openvpn服务器所在网段IP
push “route 192.168.30.0 255.255.255.0” //其它网段IP
3.openvpn客户端连接后,要利用openvpn服务器上网,即openvpn客户端连接后的公网IP与openvpn服务器的公网IP相同,需要在openvpn服务器配置文件中开启如下配置项:
push “redirect-gateway def1 bypass-dhcp”
4.通过./easyrsa gen-req david nopass创建生成的配置文件(ovpn)连接服务器时无需输入密码,若连接时需要输入密码,则使用./easyrsa gen-req david并设置密码。
5.默认情况下日志消息写入/var/log/messages,openvpn服务器配置文件中取消如下配置项前的注释可将日志消息写入openvpn.log。
;log-append openvpn.log
6.若openvpn服务器配置文件中去掉配置项crl-verify crl.pem并重启openvpn,则吊销证书的用户仍可连接。
附录:创建用户证书、创建用户VPN配置文件、吊销用户证书操作都可通过脚本简化操作。
脚本内容参考如下:
创建用户证书:
# cat create_client_cert.sh
#!/bin/bash
echo “Please input a client name for the client certificate.”
read -p “Client name: ” -e CLIENT
cd /usr/local/EasyRSA-3.0.5/
./easyrsa gen-req $CLIENT
cp pki/private/$CLIENT.key /etc/openvpn/openvpn-clients/files/
./easyrsa sign-req client $CLIENT
cp pki/issued/$CLIENT.crt /etc/openvpn/openvpn-clients/files/
echo “Client $CLIENT cert created”
exit
创建用户VPN配置文件:
# cat gen_client_ovpn.sh
#!/bin/bash
echo “Please input a client cert name for the client ovpn.”
read -p “Client name: ” -e CLIENT
FILES_DIR=/etc/openvpn/openvpn-clients/files
BASE_DIR=/etc/openvpn/openvpn-clients/base
CONFIGS_DIR=/etc/openvpn/openvpn-clients/configs
BASE_CONF=${BASE_DIR}/client.conf
CA_FILE=${BASE_DIR}/ca.crt
TA_FILE=${BASE_DIR}/ta.key
CLIENT_CERT=${FILES_DIR}/$CLIENT.crt
CLIENT_KEY=${FILES_DIR}/$CLIENT.key
cat > ${CONFIGS_DIR}/$CLIENT.ovpn <<EOF
$(cat ${BASE_CONF})
<key>
$(cat ${CLIENT_KEY})
</key>
<cert>
$(cat ${CLIENT_CERT})
</cert>
<ca>
$(cat ${CA_FILE})
</ca>
<tls-auth>
$(cat ${TA_FILE})
</tls-auth>
EOF
echo “Client $CLIENT ovpn created”
exit
注:VPN配置文件存放路径:/etc/openvpn/openvpn-clients/configs,用户使用生成的ovpn文件及创建用户证书时设置的密钥即可连接VPN服务器。
吊销用户证书:
# cat revoke_client_cert.sh
#!/bin/bash
echo “Please input a client cert name for revoke.”
read -p “Client name: ” -e CLIENT
cd /usr/local/EasyRSA-3.0.5/
./easyrsa revoke $CLIENT
./easyrsa gen-crl
\cp -f pki/crl.pem /etc/openvpn/
systemctl restart openvpn@vpnsvr
echo “Client $CLIENT cert revoked”
exit
注:运行此脚本吊销用户证书后,用户即无法连接VPN服务器。若需要恢复使用,需再次创建用户证书及VPN配置文件。