uncomment and update the following entries to match your information:
# vi vars
set_var EASYRSA_REQ_COUNTRY “CN”
set_var EASYRSA_REQ_PROVINCE “Jiangsu”
set_var EASYRSA_REQ_CITY “Suzhou”
set_var EASYRSA_REQ_ORG “Betterit”
set_var EASYRSA_REQ_EMAIL “admin@betterit.info”
set_var EASYRSA_REQ_OU “IT”
Save and close the file.
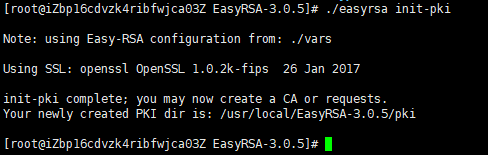
Before generating a CA keypair first we need to initialize a new PKI with:
# ./easyrsa init-pki
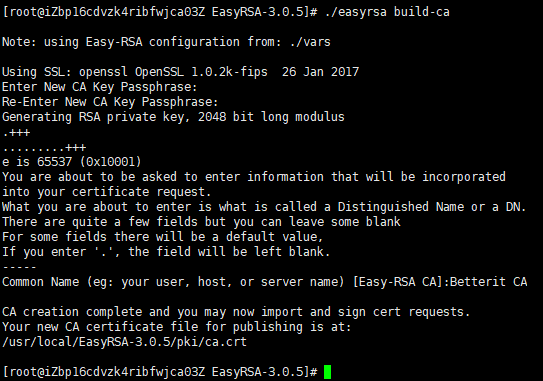
The next step is to build the CA:
# ./easyrsa build-ca
You’ll be asked to set a password for the CA key and enter a common name for your CA.
Once completed, the script will create two files — CA public certificate ca.crt and CA private key ca.key.
Now that the Certificate Authority (CA) is created, you can use it to sign certificate requests for one or multiple OpenVPN servers and clients.
Note:If you don’t want to be prompted for a password each time you sign your certificates, run the build-ca command using the nopass option: ./easyrsa build-ca nopass.
DH parameters of size 2048 created at /usr/local/EasyRSA-3.0.5/pki/dh.pem
[root@iZbp16cdvzk4ribfwjca03Z EasyRSA-3.0.5]#
Copy the dh.pem file to the /etc/openvpn directory:
# cp pki/dh.pem /etc/openvpn/
generate a HMAC signature using the openvpn binary:
# openvpn –genkey –secret ta.key
Once completed copy the ta.key file to the /etc/openvpn directory:
# cp ta.key /etc/openvpn/
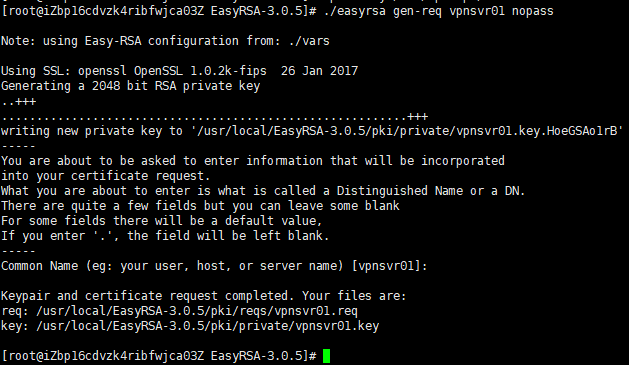
Creating Server Certificate and Private Key
./easyrsa gen-req vpnsvr01 nopass
We are using the nopass argument because we want to start the OpenVPN server without a password input. Also in this example, we are using vpnsvr01 as a server name (entity) identifier. If you choose a different name for your server don’t forget to adjust the instructions below where the server name is used.
The command will create two files, a private key (vpnsvr01.key) and a certificate request file (vpnsvr01.req).
Copy the private key to the /etc/openvpn directory:
# cp pki/private/vpnsvr01.key /etc/openvpn/
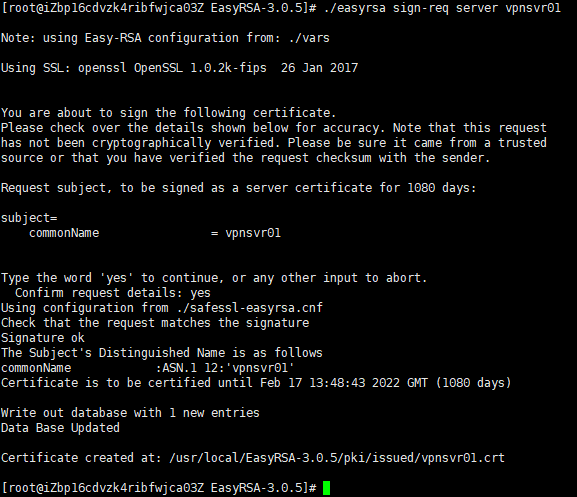
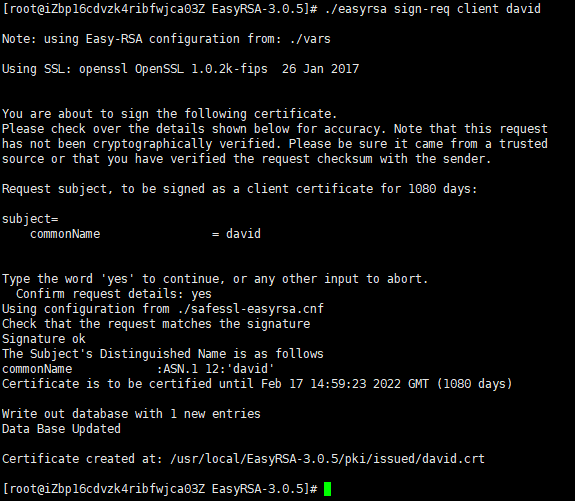
run the following command to sign the request:
./easyrsa sign-req server vpnsvr01
The first argument can either be server or client and the second one is the server short (entity) name.
# cp pki/ca.crt /etc/openvpn/
# cp pki/issued/vpnsvr01.crt /etc/openvpn/
Upon completing the steps outlined in this section, you should have the following new files on your OpenVPN server:
/etc/openvpn/ca.crt
/etc/openvpn/dh.pem
/etc/openvpn/ta.key
/etc/openvpn/vpnsvr01.crt
/etc/openvpn/vpnsvr01.key
Configuring the OpenVPN Service
We will use the sample configuration file provided with OpenVPN installation package as a starting point and then add our own custom configuration options to it.
Before adding the nat rule you need to know the public network interface of your CentOS OpenVPN Server. You can easily find the interface by running the following command:
ip -o -4 route show to default | awk ‘{print $5}’
In our case, the interface is named eth0 as shown on the output below. Your interface may have a different name.
The following command will allow the traffic to leave the VPN, giving your VPN clients access to the Internet. Don’t forget to replace eth0 to match the name of public network interface you found in the previous command.
Now we need to edit the file to match our server settings and configuration.
# vi openvpn-clients/base/client.conf
Find the remote directive and change the default placeholder with the public IP address of your OpenVPN server:
# The hostname/IP and port of the server.
# You can have multiple remote entries
# to load balance between the servers.
remote YOUR_SERVER_IP 1194
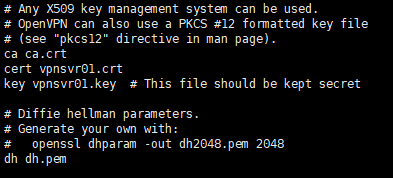
Locate and comment the ca, cert, and key directives. The certs and keys will be added within the configuration file:
# SSL/TLS parms.
# See the server config file for more
# description. It’s best to use
# a separate .crt/.key file pair
# for each client. A single ca
# file can be used for all clients.
# ca ca.crt
# cert client.crt
# key client.key
Append the following lines at the end of the file to match the server settings:
auth SHA256
key-direction 1
Once you are done, the server configuration file should look something like this:
client
dev tun
proto udp
remote 118.31.38.47 1194
resolv-retry infinite
nobind
persist-key
persist-tun
remote-cert-tls server
tls-auth ta.key 1
cipher AES-256-CBC
verb 3
auth SHA256
key-direction 1
Next, create a simple bash script that will merge the base configuration and files with the client certificate and key, and store the generated configuration in the openvpn-clients/configs directory.
vi openvpn-clients/gen_config.sh
#!/bin/bash
FILES_DIR=/etc/openvpn/openvpn-clients/files
BASE_DIR=/etc/openvpn/openvpn-clients/base
CONFIGS_DIR=/etc/openvpn/openvpn-clients/configs
BASE_CONF=${BASE_DIR}/client.conf
CA_FILE=${BASE_DIR}/ca.crt
TA_FILE=${BASE_DIR}/ta.key
CLIENT_CERT=${FILES_DIR}/${1}.crt
CLIENT_KEY=${FILES_DIR}/${1}.key
# Test for files
for i in “$BASE_CONF” “$CA_FILE” “$TA_FILE” “$CLIENT_CERT” “$CLIENT_KEY”; do
if [[ ! -f $i ]]; then
echo ” The file $i does not exist”
exit 1
fi
if [[ ! -r $i ]]; then
echo ” The file $i is not readable.”
exit 1
fi
done
# Generate client config
cat > ${CONFIGS_DIR}/${1}.ovpn <<EOF
$(cat ${BASE_CONF})
<key>
$(cat ${CLIENT_KEY})
</key>
<cert>
$(cat ${CLIENT_CERT})
</cert>
<ca>
$(cat ${CA_FILE})
</ca>
<tls-auth>
$(cat ${TA_FILE})
</tls-auth>
EOF
Save the file and make it executable by running:
chmod u+x openvpn-clients/gen_config.sh
Creating Client Certificate Private Key and Configuration
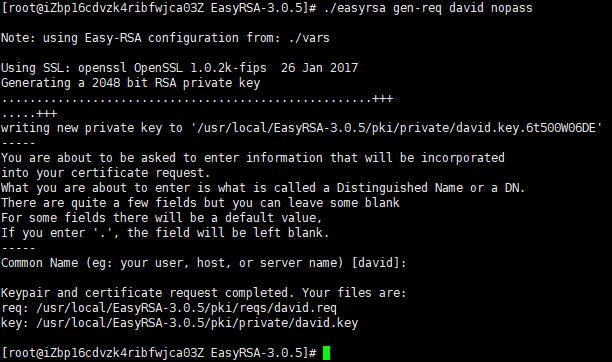
In this example the name of the first VPN client will be david.
# cd /usr/local/EasyRSA-3.0.5/
# ./easyrsa gen-req david nopass
The command will create two files, a private key (david.key) and a certificate request file (david.req).
Copy the private key david.key to the /etc/openvpn/openvpn-clients/files directory you created in the previous section: